


Hello there!
We all want a home that we feel comfortable in - a home that we love.
If budget is an issue (and when isn't it!) then giving what you already have a make over is a great way to achieve your dream home.
Enter Furniture Paint...
Never picked up a paint brush before? Don't worry - this guide shows you how to paint like a pro! You can achieve the perfect finish in 3 easy steps.
I'm guessing you're reading this blog because you've decided that it's time to give your tired, old furniture some love, maybe you stumbled across a little info, but are keen to learn more?
If you're not a serial DIY'er, and haven't done a lot of painting before, the thought of tackling a whole piece of furniture may seem a little daunting...
I'm here to let you know, that it's easy - and you can do it.
Not only that, but you will likely decide that you really enjoyed doing it, and you can't wait to tackle the next thing!
Like with any project, painting something is easier if we break it down into steps.
I've been painting for years, and doing furniture up-cycling for over a decade. I have developed a pattern I follow, and it ensures that I don't miss an important part of the process, and that I am setting everything up to make the job as efficient, and easy as possible.
I tackle my painting jobs using these 3 steps:
Prep
Paint
& Finish (or protect)
Here's the low down on each of these steps...

This really is the most important bit, so pay attention! 😉
That saying "if you fail to plan, you plan to fail" is very true when it comes to painting. Preparation doesn't have to be hard, or lengthy, but it should be thorough.
Here are my three steps of prep:
1. Clean
If you don't clean your piece properly, you risk paint flaking, cracking, and not adhering properly to your surface. 15 - 20 minutes at the start of your project can save you time, money, and disappointment later on.
Here are some of our top tips for a squeaky clean surface...
In most cases, a good clean with some hot, soapy water will do - just dishwashing detergent is fine, or a small dollop of our Vintage Bird Brush Cleaning Gelmixed into some hot water makes an excellent cleaning medium.
If you are still concerned there may be some grease, grime or wax/oil present, sand a small test spot with a medium grade sandpaper and inspect the paper. If there is a grimy film, or little beads of waxy substance, you will need to use something like sugar soap and a nylon scouring pad.
Waxes and silicone based furniture polishes may need a solvent based cleaner such as metho, or white spirits to remove the wax. Neglect this step, and you will end up with a painted finish that chips and flakes off on use.
Ensure you wait for your piece to dry completely before you start the next step.

2. Scuff Sand
To sand or not to sand?
One of our most Frequently Asked Questions!
I usually advise that it's better to be safe than sorry...
Sanding doesn't have to be a time consuming, labour intensive exercise.
The aim of giving your piece a quick scuff sand is to break the surface tension on the exisiting finish - to create tooth for the paint to adhere to.
Regardless of the type of paint you choose - it's going to be difficult for it to sit on a very smooth, sleek surface.Here are the basic steps for scuff sanding your piece to prep for painting:
- Inspect your chosen piece - what is the existing finish? This will help you determine your next step. For example, is it a factory applied, satin finish, a shellac, glossy finish on a vintage piece, or chippy, matt finish on old, shabby find.
- Don’t use too course a grade of sand paper - it can create deep scratches in your surface that you may still see through the finish once you have finished painting.I usually stick to around 180 to 220 grit.
- Sand with the grain where you can. If you are sanding in grooves and around legs, spindles etc, try to keep your movements even and try to avoid over-sanding any one area.
- The aim is NOT to sand through the exisiting surface to expose bare timber. This will increase your risk of the newly exposed timber bleeding "tannins" through your paint and creating unsightly yellow-brownish stains.
- Apply gentle pressure consistently.
- A medium sized piece like an average side table, or bedside table should take 10-15 minutes to scuff sand.
- Don't forget to clean off all the sanding dust before the next step - if possible, use a brush attachment on your vacuum cleaner.
You don't need to sand if: you have a raw timber surface to paint on, you're painting onto a previously matt finish (just make sure there is no wax finish), or you're painting on raw MDF or similar material.
3. Prime
Do you need to use a primer? Another F.A.Q! The answer to this one is determined once again, by the surface you’re painting.
If you choose to use a primer, it doesn't mean you can skip the scuff sanding step - most modern primers have good adhesive properties, but sanding gives you the best foundation on which to start your project.
If you think there is a risk of tannin bleed (where the tannins from the timber bleed through the moist paint when it's applied), then we recommend using an oil based, shellac primer, as this is the only way of really being sure of stopping strong tannins. Some types of timbers that are notorious for bleed through are Indonesian teaks, rosewood, and mahogany.
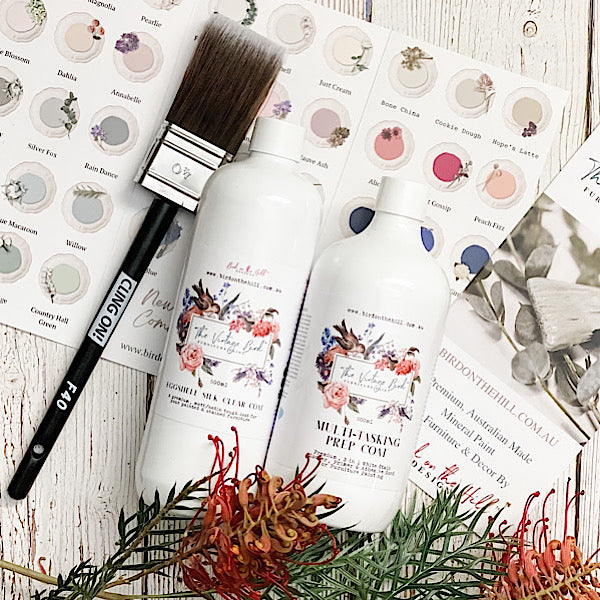
If you just want to provide an even surface for painting, or ensure a little extra adhesion, you can use a water based 3 in 1 primer like our Multi-Tasking Prep Coat.It will help hide surface stains, block yucky odours, and provide an even surface to paint on. It also means that you'll get better coverage of your furniture paint if you are painting a light colour over a dark surface.
The other type of primer is a bonding agent. We call our's Birds' Special Bond (BSB) and it is a clear drying, matt finish bond that helps to create surface tooth, and can also be added to milk and mineral paint to help with adhesion. It's a good choice for painting on laminates, smooth MDF etc...
Now you're ready to add colour!

My Best Painting Tips.
Both our mineral Furniture Paint, and Milk Paint are self levelling paints, but to ensure a finish that shows a bare minimum of brush strokes, and is silky smooth to the touch, then here are my top tips:
- Pick the best brush you can find. My choice is theCling On!brush range from the Netherlands. We use and sell these brushes because they are superior quality, last a long time, are easy to clean and maintain. My 'go to' brush in the range is theO35 mid sized oval brush.
- Don't overload your brush to avoid clumping of paint. Another good tip is to dip the very ends of the bristles in water before you start painting. Then just lower the very tip of the brush into your painting pot.
- Always paint in thin coats. This is probably the "big one" when it comes to a smooth finish (apart from your brush quality). Painting in the coats achieves the following things:
- a surface that dries quick and evenly
- less chance of surface 'drag' of paint meaning a very smooth, even finish
- a more durable surface that is less likely to crack, flake or chip

You'll find a colour to suit every interior, every mood, and every style in our Furniture Paint range!
I usually paint 3 thin coats, but if you’re painting a very light toned colour over a dark surface, you may find you need 1 more. Don't forget - be patient and don't overload your brush to get better coverage quicker - you will just end up with lumps, bumps and surface imperfections, and you will end up with the brush dragging, rather than gliding across your surface.
- Paint in light, long, flowing strokes that helps the brush glide across the surface. When painting flat surfaces, I find it easy to start in the middle, then follow the grain by gliding the brush out to the sides. DON'T be tempted to paint over the one area again and again. Just finish the surface, wait for it to dry and come back and start again. It’s ok if it looks patchy. You’ll get much better coverage on your next coat.
Put on some music, find your rhythm, and get painting!
Last, but not least, is how to protect your newly painted piece.

You're on the home stretch now! If you want to put a finish coat on your masterpiece, wait 2-3 days until it's had time to thoroughly dry, then you're ready for the last step...
Finish & Protect
If you're using our Vintage Bird Furniture Paint, it has a self sealing finish due to the premium acrylic base we use. This means it's non porous, and you can clean it by wiping over with a damp cloth. If you are painting with our Vintage Bird Milk Paint, or in a traditional chalk paint, you are best advised to use a finish as these are paints that have a porous finish, meaning they will absorb any stains or moisture, making them difficult to maintain in a raw state.
We usually recommend applying a finish to your painted furniture, especially if it's going to b a "high traffic" piece - like a dining table, coffee table or beside table for example.
Using a finish gives you an extra layer of protection, and can help to preserve colour integrity, and make your piece moisture and chip resistant.
The 3 options designed for our paint ranges are:
- Wax finish
- Oil finish
- Water based clear coat finish
Here's the low down on all three options...
Wax Finish
If you're looking for a beautiful, silky, traditional finish for your painted furniture, it's hard to go past the look of Furniture Wax Paste. It will give you a lovely sheen, smells divine, and will help to highlight the colour you’ve chosen. To apply you need to brush it on in a circular motion with a good, stiff, bristled brush. Our choice is the premium Madeline Wax Brush from Canada. Waxing takes a bit of time and effort - you will need to apply at least 2 coats, buffing between each one. You should also re-apply wax every 6 months or so to maintain the finish. We don't recommend wax for high traffic surfaces because of this, but it's a beautiful finish for that special, decorative piece, and traditionally used on antique furniture.

Hemp Oil has been used inside this vintage cupboard as well as on the painted surface to condition and revive the old timber.
Oil Finish
Our Hemp Finishing Oil is probably the easiest Finish to use. and has lots of benefits. Simply brush it on with a natural bristle brush, or use a clean, lint free cloth. Leave it for a couple of hours, then towel off excess with an old towel (as lint free as possible) or large microfibre cloth. You may notice that the oil has completely sunk into some areas, but may have a residue on the top of others. This just means that the timber is "thirstier" in those spots, and hemp oil is a fabulous timber conditioner! Once you've towelled off all the excess (pay special attention to removing excess oil form any little crevices, or decorative, carved areas) you can use another lint free towel or cloth to give the whole thing a good buff. The surface may still look a little "wet" or oily for a few days, and you may need to re-buff in a day or two, as the oil continues to sink through the painted layers into the timber surface - effectively moisture proofing, and locking the paint to the surface. You can re-apply a thin layer of oil about every 8-12 months for high traffic surfaces that get lots of use.
Clear Coat Finish
We recommend using water based clear coats - our top coats are non toxic, and fume free, and water based clear coats don't tend to yellow over time like oil based ones do.
We have Eggshell Clear Coat and Gloss Clear Coatoptions in our range.
The Eggshell is a subtle sheen that sits between matt and satin, and the Gloss is not too shiny, and sits between a satin and gloss finish.
It's also easy to apply, and it's a great way to protect your surfaces as it's moisture, chip and crack resistant, and super easy to clean with just warm, soapy water on a clean cloth. Both sheen levels are also perfect for applying over rub on transfers, using as a medium for decoupage.
Our Eggshell Clear Coat has been used to seal and protect the Redesign Decor Transfer on this vintage blanket chest.

If you’re keen to start your first piece, check out our Vintage Bird Paint Beginners Bundle. You'll find everything you need to get started, including enough mineral Furniture Paint for a medium project, a great quality Cling On! brush, and our multi-purpose Brush Cleaning Gel.
You'll also save on the RRP of all items, as we've put a special bundle price together for you!
Still in need of some inspiration?
View our gallery of beautifully painted pieces in a great range of colours and styles here...
Happy painting & have fun!
Corrina & the Team at Bird on the Hill xx